Wednesday, December 14, 2016

PanOceania Svalarheima Jotums

I've had it done for a bit now (I just missed having it completed for Gen Con 2016), but for those who haven't seen it, here is my converted Jotun.

Credit for the conversion idea goes to whichever forum denizen did it first; it has been years, and I can't find the original post that inspired my take. I'm quite happy with the OSL on the spaced forearm plates; the salt masking weathering less so, but it was a fun experiment.


As always, please feel free to message me if you have any questions about technique, or constructive criticism to offer. I love any opportunity to improve.

Saturday, August 27, 2016

Silver at Gen Con 2016

I'm pleased to report that my conversion of Joan of Arc earned me Silver at the Miniature Painting Competition at Gen Con this year.

Joan on imgur.com
Faces are the centerpiece of most paint jobs, but it is senseless for armor to not include a helmet. So, to include both in this piece, I converted Joan to carry her helmet in her left hand and her sheathed sword in her right. I'm also hugely proud of the damask pattern on her tabard; it is painted with the shade color of the red velvet, and so seamlessly appears in the light and disappears into shadow.

On my hobby table:

  • Molding a Neoterra Bolt w/Combi
  • Converting a Svalarheima Nisse Sniper to carry a Combi
    • Not coincidentally, that Combi bit comes from casts of the Bolt.
  • Painting my converted Svalarheim Jotun.

Monday, December 24, 2012

Just What I Wanted

I can't recall the last time I found a model that I was perfectly happy with. Oh, sure, there are lots of neat models out there, but I've come to realize I'm going to want to make at least some changes to any model I find.

Take, for instance, the PanOceania Indigo SpecOps model for Infinity. This is one of the first models that they've ever released that encourages conversion. It comes with two heads, one with a beret, and one with a six-optic helmet. It also has a multi-rifle, a heavy machine-gun, and a spitfire in addition to the combi-rifle in the model's hand.

Here's where the problem comes in. In the rules, a SpecOps mini can be armed with multiple weapons. But the basic weapon of all of the units from which Indigos are drawn is the combi-rifle, so the only bit that includes the arm is the combi-rifle. All the other weapons are modelled without the arm, so they can be attached to the model's back, or wherever.

I don't fancy the idea of a pile of additional weapons on my Indigo's back or base. What I'd most like is to have each weapon modelled with an arm, so that I can magnetize each one and swap out arms as necessary.

Sculpting the arms from scratch would be one answer, but that's a little beyond my abilities. Instead, I've decided to make a mold of the arm with the combi-rifle, so that I can cast it and cut out the rifle and replace it with the other weapons.

The first step is to make a box. I've cheerfully accepted Bruce Hirst's customer's suggestion of using Legos for this purpose, as you can see here.


Then you fill the bottom of the box with modeling clay. I try to fill it as close to halfway as possible; this will let me use the height of the Lego box as a guide to the size of the eventual mold. When the clay is ready, you press the piece you wish to mold into the clay. Try to ensure that the bit is halfway submerged, and that the clay forms a tight seal around the edge of the piece. If there are any gaps around the edge of the bit, the liquid rubber is likely to flow down into them.


In this picture you can see three more important features of the mold-making process. First, the round depressions made by the end of a paint brush handle will form registration keys. These keys will be reproduced on both sides of the mold, and will force it to line up, helping to prevent miscasts and off-set flash around the edge of the model.

Second, I've made a little pipe of clay running from the edge of the box down to the tip of the gun barrel. This will help to form a vent for the air to escape. If the void the resin fills forms a simple depression, then even a low-viscosity resin will find it hard to flow around all the bubbles that can form.  However, if there are vents that the air can flow out of, then the resin will be much more likely to penetrate every nook and cranny, doing a much better job of preserving detail.

Third, in that photo you can see a shiny finish on the clay around the outside of the bit. That is a mold-release compound. The silicone rubber that I'm using cures (hardens) in the presence of tin, which can be a problem when making a mold of a metal piece made primarily of tin. In the first mold I attempted, the rubber cured to the surface of the bit, and I wasn't able to free the piece from the mold. I ended up having to cut the bit out and scrape the rubber off its surface. The mold release forms a barrier between the rubber and the surface of the bit so that they come apart easily.

At this point, you can mix up the first batch of rubber. It goes slowly over the top of the clay, filling in all of the details. The cure time of the rubber I'm using is six hours (your mileage will of course vary); I then went to bed.

In the morning, I broke up the Legos to reveal a block of half silicone rubber, half clay. The halves separated easily, revealing the bit still stuck in the clay. I freed it, cleaning the remnants of clay from it, and then turned to the rubber.

Just like the clay served as a support form for the silicone that became the first half of our mold, the first half will now support the second. I re-made the box, and placed the rubber face up in it. I then painted a layer of mold release into the impression of the bit, and pressed the bit into it. This wet mold release will help to form a seal around the bit, again preventing the wet rubber from soaking into crevices. Then, I painted three coats of mold release across the face of the mold, waiting for each to dry before painting the next. Silicone bonds very well to itself; the mold release is necessary to enable you to break the mold into two pieces again instead of entombing the bit forever in a solid if wiggly block of rubber.

After the mold release is dry, mix up the next batch and pour it slowly over the top of the mold, filling up the top half. Another six hours, and you'll have something like this:


I say "something," because in the right half you can see a negative impression of the "pipe of clay" I made earlier. The left side will have a positive impression that fills up and blocks the vent. With a hobby knife, I shaved off the positive impression, leaving the channel open when the two halves meet. It is also possible to make the mold without vents or channels, but then you'll likely have to cut them into the surface of the mold with a hobby knife.


Here is the result of the process: two casts of the arm (with the extra resin from the vent removed), ready to have the combi-rifle removed to make way for an alternative weapon choice. I've been thinking heavy machine-gun, at least initially. We'll see!

Tuesday, November 13, 2012

Non-Linear Narratives, Or My Basement Is A Mess

Regular blog posts have been much more challenging than I expected! To some degree, this is because I am lazy (no big surprise there, and at least I'm in good company). But there is a deeper issue at work.

I've found that my adventures in the hobby world don't fit well into the episodic narrative of a blog. The contained nature of a blog post implies an order that is completely missing from the stream-of-hobby that is my leisure time.

The current issue I'm facing is that I have a lot of issues. I'd like to do some painting on that TAG I showed off, but it is currently un-primed. I don't want to use spray or brush-on primers any more, so I've recently purchased a bottle of Vallejo's Surface Grey Primer that I would like to try.

However, before I can try airbrushing that primer, I'm going to have to clean out my spray booth. It is currently swamped with plaster paraphernalia, because I have been working on terrain for Infinity (a lot of this is going to be Infinity-related) using the Hirst Arts Sci-fi Basic Interior molds. I've been casting like mad, but I wanted to have a substantial amount of casts completed before construction began. In the past, I've cast some blocks, built what I could, and then waited while more casts dried. That waiting was a buzz-kill, and I'd like to avoid it if I can.

I do have lots of blocks completed already - I'm guessing 50% of them for that first project, though I might be in better shape than that. But I cannot simply have the blocks in a bin. I've tried it before - even though I'm using dental plaster, the blocks will rub against each other and cause wear. On a "gothic" building, that might be desirable, but the sci-fi molds are all about crisp detail. So, awaiting construction, I have a vast forest of small blocks neatly stacked covering a third of the four-foot table end that we'd actually be playing Infinity on.

I do have other projects I can be working on. This is not the only one of my PanOceania Fusiliers - I have several others in various stages of completion. I'd like to get some work done on them, but my painting area is a mess. I can't really get any painting done without getting all the detritus of other projects packed away, or at least moved to alternate areas (like the other thirds of remaining halves of the gaming table!) But it seems a complete waste of time to sort, organize, and put away all of those items when I'll be moving it all to another room of the domicile soon anyway.

That's right, Careful Readers! Like the chinchillas of old, I will be spending all night for very likely several nights in a row moving every speck of furniture and bric-a-brac in the middle and lower levels of the townhouse to new locations, sometimes on different floors. Sometimes this will be trivial, like moving the Xbox into the basement. Sometimes it will not. For example, leaving the living room will be the Bearded Dragon (Rufus), the Guinea Pigs (Laurie and Lady Eileen), both species' habitats, including ancillaries and support structures, and a recliner. Leaving the basement will be all of the hobby materials, including two tables, two cabinets, a metric butt-ton of paints and miniatures, and the aforementioned spray booth, which when carried by one person weighs roughly as much as a Miata (hyperbole). I will even be moving all of my books, which at last measure weighed more than eight hundred pounds (not hyperbole).

But before I can do any of that, I will need to tear down the game table. With it in place, there isn't any space for any of these other items to get moved. And I think I've mentioned the little brickyards in place on it. I haven't yet mentioned the Go board, or the electronic parts, or the laundry (luckily in a folded state at this time).

But it isn't even worth cleaning off that table until we get rid of that couch...

PanOceania Fusilier 2

Infinity PanO mini two is another Fusilier, Tracy Bennett.


I've used all the same techniques that I did on Emmet, with the obvious exception of their skin tones (full disclosure: I actually painted their armor at the same time, in an attempt to ensure uniformity of their, well, uniforms). I also spent a great deal of time working on her eyes, which came out pretty well. There is a degree of asymmetry there, but I think I can justify not obsessing over it by reminding myself that faces are asymmetric in nature.

Interestingly, while the female PanOceania troops equipped with heavy armor are required to wear high heels, troops at the enlisted level are allowed more sensible footwear. I have considered many small conversions of these figures; I may attempt to replace the silly heels with feet cast from this model. Time will tell.

Careful viewers may recognize the decking beneath Tracy's feet from Hirst Arts' Starship Deck Mold #270. I've been so impressed by the level of detail on the Infinity minis that I feel compelled to make sure the terrain is as high-quality to match. The casting has been pleasant; the painting, less so. More on that later.

Sunday, September 30, 2012

Newest Project: Infinity PanOceania Armored Cavalry

Here is my newest Infinity project: the PanOceania Armored Cavalry TAG.


I'm sure many of you will notice that this model isn't the same one listed by that name. The original Armored Cav, the Squalo, is... not to my taste. But careful reading of the Human Sphere sourcebook tells me that the Jotums and Dragões TAGs are based on the Squalo chassis, and that the Jotums is basically just an up-armored Squalo. So, my Armored Cav will be a Jotums without the spaced armor.

These photos are obviously just past assembly. I've balanced the shoulder armor on the model for these shots; I've left them unglued because much of the shoulder detail (myomar bundles?) may be visible after assembly, but unreachable for painting. I'll affix them later.

Invisible in these shots are the many pins I used. Two through the pelvis (reaching all the way from one leg to the other), one in the tail, one through each shoulder joint, one in the forearm joint supporting the HMG, two into the chest armor, and one in the neck. I do not intend to have to re-glue any components of this model in the future.

I've got a new can of primer coming in the mail; I'll post more shots as I get paint on the model.

Questions and comments are always welcome.

Thursday, September 20, 2012

Combat Heels = Facepalm

First up, the inspiration for this article was this thread from the Infinity forums: Sexual objectification in Infinity?

I worry that when I say am a feminist, people will imagine I mean one of the characters from Kate Beaton's fantastic comic. When I say feminist, I mean it in the Rebecca West sense of "the radical notion that women are people." My culture will certainly on average agree with that statement, but its actions don't always line up with the ideal. This is especially obvious when feminist issues crop up in traditionally male-dominated pastimes, like miniature gaming.

I'd very much appreciate it if the world would just "get better" in regards to the manifold ways it disappoints me regularly, but I don't often have the energy to fight the good fight. I'm especially reluctant to think that arguing with forum denizens with which I disagree is likely to result in any significant ameliorating of their attitudes. Unsurprisingly to those who know me, I also cannot keep my mouth shut. What I try to do most often is address the issue with humor, and try to add something that has the possibility of educational value.

The original poster in the referenced thread seems to feel that some of the depictions of females in Corvus Belli's miniature range for Infinity are problematic. To quote:
I do not really mind if there's some clevage here or there but when more than half of the female minituares are dressed down and/or with a hand on her hip it gets a little bit tedious. Especially when comparing them to their male counterparts who are armoured, with helmets and in the middle of the action. -bladerunner_35
I'm solidly in agreement with bladerunner_35 here. Yes, humans have sexual attributes. It is perfectly reasonable to depict those attributes if your aim is to depict humans. However, it is preferable to depict any human, male or female, real or imaginary, with respect. It is very difficult to argue with any sincerity that models like the Ariadna Caledonian Volunteers or the Nomad Reverend Moiras depict women respectfully. I do not mean to imply that all female characters depicted by Corvus Belli's miniatures are disrespectful to women; there are some great figures there. I also do not dispute that Corvus Belli has the right to make whatever artistic decisions they want - of course they do! But it would be better if more women could look at the Infinity models and see depictions of characters they would like to identify with, rather than the objectifying examples to which they are so commonly subjected.

Because I didn't have the strength at the time to attack some of the pathetic straw-feminist arguments I saw, I instead posted in that thread a link to the Anti-Comics-Feminist Bingo Sheet. Here is a selection of posts from that thread, and following each my justification for scoring that post on my bingo card. Please note: I will not score any post that seems to claim that sexism isn't a problem; only those posts that claim that Corvus Belli's depiction of women is not sexist. There can be no meaningful discussion with people who know what sexism is and think that it is ok.

Cervantes3773 posts "If it bugs you that much, vote with your dollar and don't buy those models." From the bingo sheet: "... sexism is wrong, whether you think it is a waste of time or not."

The Last Foxtrot posts "With an anime style theme....this is bound to happen. Theres no way around it." But "... Sexism is not necessary. It’s just habit."

werkrobotwerk posts "Riotgirl is also a faster lower armor heavy. Hence built up legs and minimal torso protection contrast to the mobile brigada, who is also female, but with a higher armor, and lower speed. She has her armored bulk more evenly distributed." Another example of "... the parade of comic book women who ... just happen to have personalities that require costumes emphasising their primary sexual traits." To be fair to werkrobotwerk, I don't think the Riotgrrl is the most egregious example - she just could be better.

drizz73 posts "I think if most guys are really honest it is what they want." "If you genuinely believe men just have to objectify women ... then you have a really, really low opinion of men." See also post #70.

savonarola posts, with implied sarcasm "Miniatures should be fat and ugly because many real people are and so they will not feel humiliated" and "There are places in the world and situations everywhere where women need real help. Lift your butt, pseudo-philosopher, and help a real person." Double score! "... your critic want[s  figures] of women treated as realistically as men are, in the same manner, with as much variety in face and body type. Apparently, you find that threatening and have jumped to an exaggeration of their argument that also demonises fat and those who don’t fit the cultural beauty standards." and "The More Important Things Fallacy! ... it combines an utter cluelessness of the impact of cultural artefacts on our, y’know, culture, with the arrogant assumption that complaining about comics is as far as your critic goes when it comes to women’s rights ... don’t you dare assume that ... the portrayal of women in [miniature form] doesn’t feed from and into deeply disgusting misogynistic tropes. Sexism is everywhere. Your critic is choosing to fight it in at least one place they see it. That’s admirable, not risible." He does this again in post #153. I sense a pattern.

Harlekin posts "... if everything looked just 'realistic' we wouldn't be around to trash talk about this 'problem', because nobody would have bought any of those miniatures." But "... we all want a certain amount of realism."

evilleMonkeigh posts "my wife ... went with the nomads BECAUSE of the Moiras ... I would say 99% of the thread respondents here are men, and 99% of women wouldn't care. So why should we?" "It is never appropriate to use your sample of female friends, or yourself, as a trump card that triumphantly deflects all feminist criticism with which they/you disagree."

Also, special mention goes out to micf2303: "objectification of women is bad in a sense" Good job! You win!

Yeah - I've run out of steam. I can't be bothered to keep going and see if I've won anything. I do feel some hope when I see that Corvus Belli has released a new Daktari model, in place of their old one. I think it is a sign that they are at least aware of the issue.

*Credit to Corbeau on the Infinity Forum for the title of the post.

Tuesday, September 18, 2012

PanOceania Fusilier

My lastest project is a small PanOceania force for Infinity. I'm getting more and more excited about Infinity lately. I think the small force sizes will allow me to pour some attention into each figure of my army. I've started with the Fusiliers, as I'll have at least a few in any list I write, and they will help me to refine my color choices and techniques before I tackle something more complex.

Here is the first of my Fusiliers, Emmet Wilson.


I used Wilson for two major painting experiments: his armor, and his skin tone.


The armor plates were painted with zenith highlights using my Badger Renegade Velocity airbrush. The procedure was simple: a dark gray base-coat and a black wash prepared the surface. Then, holding the model so that its head faced towards me, I lightly sprayed a medium gray so that only the surfaces facing me would be highlighted. Next, a light gray even more lightly applied completed the highlights.

A word of warning for those attempting this technique: at this scale, any significant spatter from the airbrush is very noticeable. On Wilson's left shoulder, you can see some very small white spots from the last highlight layer. They are almost invisible upon close examination, let alone table distance, so I'm not unhappy. But try to make very sure that your airbrush is clean, and that you are using the right pressure for the consistency of your paint.


His skin tone is the other experiment I mentioned. I haven't painted any African skin tones before, so the color choices were a bit outside of my comfort zone. I used Reaper Master Series Dark Shadow, Dark Skin, Dark Highlights, and Tanned Shadow in order from darkest to lightest tone. The technique itself was tried and true: progressively highlight anything that sticks out.

Wilson is only the first of my PanOceania forces - I have three more Fusiliers, including a hacker, a Croc Man, and and Orc Troop on the painting table right now. Stay tuned!

Monday, September 10, 2012

Exercise and painting

I've been worrying about the gradual expansion of my waistline for some time, but other than some low-grade dissatisfaction, it hasn't had a major impact on my life - until recently. The other day, my kindergarten-aged son discovered the joys of placing his hands against my belly and pushing until I barked at him to quit. He was amazed (and I, disconcerted) to discover just how far he could press in.

So, now I'm going to the gym. My strategy is as follows: first, I will focus on increasing muscle mass. That will help to increase my caloric needs, with the fringe benefit of helping my self image (I currently resemble a lump of uncooked bread dough). Second, I will "fill in the corners" with cardio to improve tone and overall fitness. Tactically, that means I will lift weights until I think I can't anymore, and then use an elliptical trainer until I want to puke. At my current level of capability, I'll certainly be able to handle more strength training than cardio, but over time I think the ratios will balance out.

In practice last night, it worked pretty well. The gym at the hospital for which I work is open twenty-four hours, so I had the place to myself at three in the morning. I did some squats and some calf work (at an embarrassingly-low weight, but there is after all a reason that I'm working out), and then pounded on my upper body for a while. I didn't feel comfortable using the free-weights. First, even though they have safety bars, I've had it pounded into me that you have to have a spotter. Second, and more immediately pressing, was my phone. I loaded up my iPhone with books-on-tape, to provide me with some mental activity. I don't have a bluetooth headset yet, so around the free weights I constantly worried about where to put my phone. Close enough to reach my head? Far enough to avoid constant drops? Too much to worry about.

So I used the weight machines, and sat my phone on the weight stack instead, and did what I could, and went home. I then sat down to paint some PanOceania Fusiliers, and boy did that not work out. It seems that heavy physical exertion in the upper-body promotes involuntary muscle tremors. I've got some good technique, but there's only so much that bracing your arms can do.

Moral of the Story: Paint before you lift weights, not after. I'll have some photos of my Fusiliers to share soon.

Thursday, September 6, 2012

More than 40K

I've been glancing through my posts, and I've noticed that the only photos I've posted so far have been Warhammer 40,0000 figures. It might be easy to assume that those are my only miniatures-related interests.

The High Elves from Warhammer Fantasy Battles were my first miniatures, and while I've essentially only played the game five times in twelve years, my elves will always hold a special place in my heart.


This Prince is a conversion using a metal Lord model (the one with the boring axe), and a greatsword bit from the plastic High Elf Prince and Noble boxed set. I had to file down the vambrace on the plastic bit to make sure that the components matched, but I think it worked out rather well.

I'm also very happy with the fine detail on this piece. The gems on my models are a particular point of pride for me, and I've painted thousands of them. I think these are some of the best I've done. I also painted a free-hand border on the cape. The pattern I chose was simple, but it adds interest in what would otherwise be a boring part of the composition without overwhelming other features.


I spent at least twenty hours on this model, but I think the results are worth it. When I am teaching new painters, my most common advice (after "take care of your brushes") is "slow down." Many new painters are hoping to get their armies painted in an afternoon. Realistic or not, that hurry is understandable, but it doesn't lend itself to the precise painting style depicted in these photos. If your goal is to have the prettiest models around, paint half as fast. You'll do twice as well.

Questions or comments are always welcome.

Sunday, September 2, 2012

Project Completion: Phoenix Bomber

As promised, here are some photos of the completed Phoenix Bomber. Sadly, I don't have my light box set up at this time, so we'll have to do with my painting light (direct fluorescent illumination).


Earlier, I had mentioned my worries about a lilac bloom on the white accents. At this point, I think the problem was poor cleaning of my airbrush. I've switched from a siphon-fed to a gravity-fed double action brush since that time, and I 'm very happy with the results. More on that tool in another post.


There were three different models I could have selected at the time I purchased the Phoenix; the other two are the Nightwing and the Vampire. The Vampire was quickly eliminated on a cost basis. Choosing between the Phoenix and the Nightwing was more difficult. Both were similar in price, and very dramatic models. In the end, I chose the Phoenix because of perceived utility (the Nightwing is an interceptor, and at the time no one I knew had any flyers), and because with two pilots, there would be more opportunity for the fine detail that is so compelling to me.


I'm fairly happy with the way it all turned out. I've noticed that on the rank-and-file infantry figures in my army, the main red color is considerably darker than it appears on my larger-scale miniatures. This is because the final stage of the red sections is a drybrush of Citadel Blood Red. On the infantry figures, the drybrushing only results in accents, particularly on the highlights on the armor. On vehicles, the lack of texture requires more time and pressure for a drybrush technique, so more paint gets applied. I've considered going back with a glaze to darken the tone and add detail, but that will wait for a later project.

Comments or questions are always welcome!

Saturday, September 1, 2012

À la recherche du temps perdu

Well, it seems that time has once again slipped through my fingers.

For those of you who are interested, the Phoenix Bomber has been complete for some time now - in fact, it and my Revenant Titan have been on display at the Game Preserve in Lafayette Indiana for some months now. I will be posting photos of the two in the near future.

Current Projects:

Eldar Dire Avengers (95% complete)
Eldar Support Weapon (95% complete)

High Elf Lord on Griffon (25% complete)
Basically an entire High Elf Army (2% complete)

PanOceania Fusiliers force (25% complete)

D&D tabletop/online campaign (98% - now scheduling!)

Monday, June 13, 2011

Project Update: Phoenix Bomber

Subtitle: Stupid Purple

When last we'd met, I'd finished the red undercoat of my Phoenix, and was contemplating the application of the white accents. I should have done some more contemplating.

The red undercoat has bloomed through the white and made a lovely purple tone. I quite like the purple; it reminds me of some flowers my mother planted in the back yard of the house where I grew up. What it does not remind me of is the white accent color of the rest of my army.

Two possible causes of this debacle: the paint siphon cup that I'm using is stained with the red I've been using as a basecoat, and the red pigments are mixing with the white; or, the solvents in the cheap airbrush paint I've been using are dissolving the lower layers, and causing the red pigments to bloom through. The test is simple. I've replaced the small siphon cup I'd been using with one of my larger glass siphon bottles, and put down another layer of blue. If that stays blue, then the siphon cup was the culprit. If not, then I brush on a layer of varnish, then blue, before I return to airbrushing the white.

Either way, gigantic hassle, but not unexpected: I constantly experiment with new techniques. Sometimes they come out terribly! With luck, the blue I've just put down will be the fix we need - if so, I'll post pictures soon.

Friday, May 27, 2011

I heard there were these special French paints

Once upon a time, while I was wandering the streets of West Lafayette, Indiana, I noticed a shop called the Game Preserve. Thinking to myself "I can always use something else to distract me from the homework I'm not doing," I went inside. I assumed that I would see a shelf somewhere that had Dungeons & Dragons materials, which would at the time have been enough for me to decide that the place was cool.

I was instead confronted with a glass case that contained what seemed like hundreds of exquisitely painted miniatures. I knew that some people used lead figures to represent their D&D characters, but this was different. Even though they were clearly fantasy figures (elves, dwarves, et cetera), many of them were organized in military units, marching in rank and file. It was breathtaking.

That was my first introduction to Warhammer Fantasy Battles. I started to pick up some figures, paints, and brushes, and tried to paint my first miniatures. They were terrible. No matter what I tried (then) my minis looked (to me) like flat, paint-by-number blobs. They didn't look anything like the figures in that magical glass case.

Particularly impressive to me were a group of five miniatures standing by themselves near the front of the case. They looked to me like a combination of fantasy and sci-fi, laden with guns and swords, power armor and horned helms. I eventually learned that these models were Chaos Space Marine Terminators from Warhammer 40,000, but at the time all I could see was how incredibly well painted they were. It looked to me like they weren't painted at all, that this was simply a tiny window into the world where these terrifying soldiers stood menacingly on the battlefield.

I needed, desperately needed to know how I could make my miniatures look like these. I didn't know enough then to ask the right questions about technique and materials, about the best ways to learn composition and style. What I actually asked must have sounded something like "How did he paint them like that?" I say must have, because I vividly remember the manager's response:

"The guy that painted those is from France. I think he was using some special French paints."

Years later, after I had unwittingly befriended "the guy from France," Matthieu ChanTsin, and learned that he'd painted those models, I pumped him for information about those special French paints. "I don't know what you're talking about," he told me. "I painted those when I was working for a Games Workshop store, and I just used Citadel paints."

The punchline of the story is that when I asked that manager (Mister Carlos Fernandez, gaming celebrity) about his response all those years ago, he didn't remember it at all. A simple throwaway comment had me convinced for years that special, perhaps imported, but definitely expensive materials were required if I wanted to paint beautiful miniatures.

The moral of the story is that you can do anything with any tools, as long as you know what you want to do, and know how to get it done.

Special thanks to Matthieu ChanTsin and Carlos Fernandez, for providing me with the material (anecdotal and neurosis-related) for this post.

Project Update: Eldar Phoenix Bomber

Of my ongoing projects, my current favorite is an Eldar Phoenix Bomber. I think it is my favorite because it is probably the most useless of the things on my hobby bench.

That statement requires a lot of unpacking. I've said that I enjoy playing 40K, but there's some nuance to that statement. I do not enjoy playing 40K anywhere near as much I enjoy modeling, painting, or owning finely crafted and painted miniatures for 40K. Because I don't feel any pressure to get things painted so I can play with them, I don't have a particularly large painted army - the most I can really field in any reasonably painted state is around 500 points. But my reasonably-painted state is fine indeed. For example, here are my Eldar Fire Dragon aspect warriors:

I don't really field models painted to a lower standard than that unless there's an emergency.

Playing 500 point games is a very different experience than the 2000 point variety. Faster and cheaper probably sums it up (this can be a very expensive hobby, after all). But there is another type of game, for those who find 2000 points to be a little restrictive. Apocalypse is a streamlined 40K ruleset that accommodates very large armies, starting at around 3500 points per side. It would be hard to notice a five-man squad of Fire Dragons in a game like that, which is where models like the Phoenix Bomber come in.

The Eldar Phoenix Bomber is a flyer, which is a unit type that isn't even legal in a standard game. As a flyer, it can get just about anywhere on the board that you want it to be. It also has an interesting mix of armament for an Eldar unit: two shuriken cannons for other flyers, a pulse laser for light vehicles, and two phoenix missile launchers (same stat line as a reaper missile launcher, with a total of six shots) - great for infantry. While most models in the Eldar range are specialized to the point of laser focus, the Phoenix is a rare all-rounder.

And to field it, I'll need to paint up around 2,650 more points, which at the current rate is just this side of never - that's what makes it "useless." But with so little pressure to get it finished, working on it is very enjoyable. Combine that with how cool the thing looks in my head, and it is easy to see why it is my favorite.

This work-in-progress shot of my Phoenix Bomber is from above, giving a good view of the craft's overall profile. The red you see here is the first stage of any model that displays my craftworld's colors, and it is almost complete (I still need to overbrush Vallejo Blood Red on the vertical stabilizers). Still remaining are the airbrushed white accents, ventrally-mounted weapons, pilots, basing, and detail work.
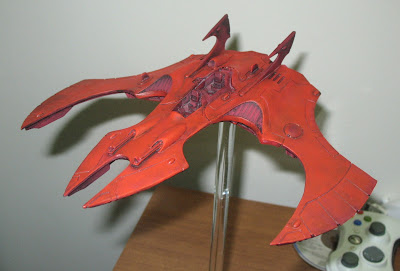

The model originally came supplied with a large Citadel flying base, which is among the most ridiculous modeling suggestions ever made. The clear plastic material in those bases is rigid and brittle, and far lighter models than this have blithely shattered their bases with no provocation whatsoever. The stem of the original base was also no taller than an inch and a half, which means that the tips of the wings would almost brush the ground - not a dignified posture for a model in flight.

I took the liberty of replacing The Silliest Flight Stand In The World with a Twelve Inch Flight Stand from Dragon Forge Design. The new stand's primary component is an acrylic rod. It is supplied with two resin brackets to affix to the base and model of your choice. Here is a picture of the bottom bracket affixed to an eight-inch chunk of MDF:


Here is a close-up of the bottom bracket. It doesn't look very Eldar, and so I'll likely be covering it up with some base detail, but I'm not yet sure how I'll go about it. The volume of green stuff required would be prohibitive. I'll come up with something.

The top bracket had to be cut down to fit between the contours of the bottom surface of the model, but not too much. It too doesn't look very Eldar, but my feeling is that it will be obscured by the model too often for me to worry about it.

Come to think of it, that last statement isn't completely honest. I don't mind that the style of the bracket doesn't fit, but only when it is obscured by the model. A friend of mine once taught me that there will always be someone who insists on looking at every part of a model, and I don't want the underside of my Phoenix to have a big industrial bracket under it. In the end, as an engineering compromise, I carved out spots in the model and the top bracket for magnets I'd recovered from a failed hard drive.

The magnets hold the (expensive, fragile) model quite securely, and allow it to be removed when nosy admirers simply must check to see if I've painted the bottom.

I have a long way to go on this project, but with the base coats almost done, very nearly all that's left are the good bits. Base coats bore me to the degree that they generally take me longer than fine detail would.

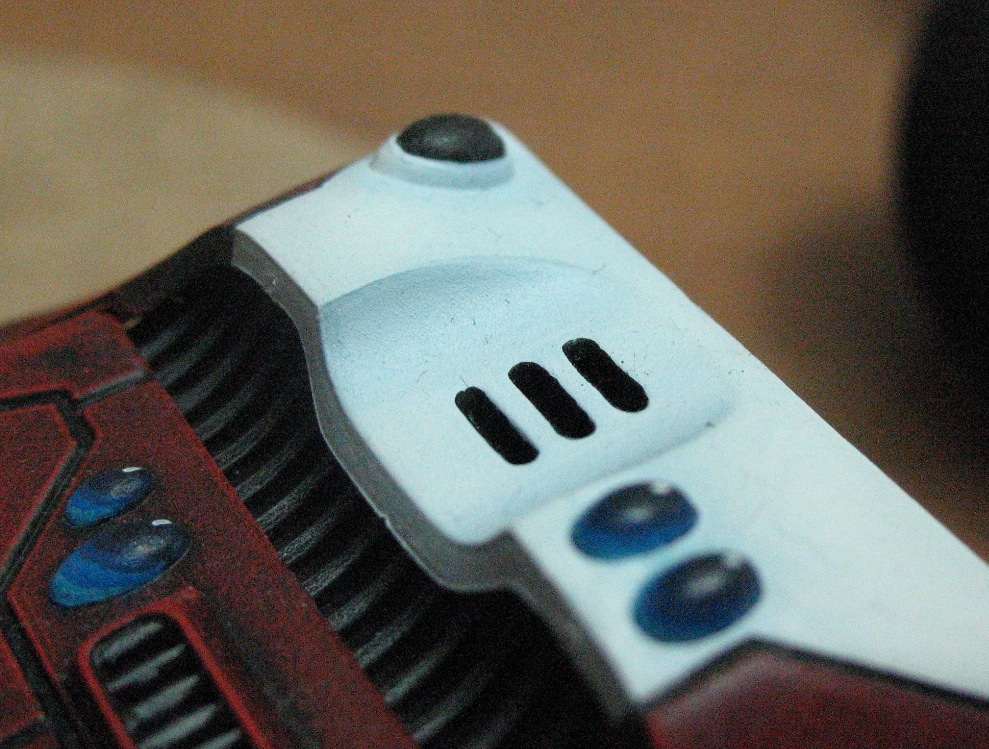
The next steps will be finishing up the underside with a quick coat of Citadel Codex Grey, and then a wash in Badab Black. Accent color involves masking the reds and airbrushing Space Wolf Grey, then airbrushing a highlight of Titanium White. The result will look something like this:

The white-on-pale-blue imparts an illusion of contour that I particularly like, and that I use on all of my vehicles. It is also a royal pain to implement with a standard brush, hence the airbrushing.

That's the current state of my Phoenix Bomber. I'm not sure when I'll be working on it next, but I'll post more pictures as it comes along. Comments or questions on my techniques or composition are always welcome.

Wednesday, May 25, 2011

My Beloved Eldar

In my last post, I listed a number of projects that were currently underway in my hobby area. Even the least astute members of the audience will notice that the lion's share of them are Eldar.

The Eldar are essentially space elves from Games Workshop's Warhammer 40,000 universe, and they are the reason that I became interested in 40K. The lithe grace of their infantry and the smooth, flowing lines of their vehicles set them instantly apart from the rest of the miniatures available for the game.

To help illustrate why I love the Eldar, and to provide a finished contrast to the in-progress projects I intend to present, here is a finished Eldar Wave Serpent transport from my army.

This is the left side view, showing the shape of the model and the high-contrast color scheme I've selected (in another post, I will discuss at length why bright white might not be the best choice for one's painting sanity, but I think it looks great).


This is a close-up of the articulated cockpit and pilot. The pilot is a resin model from Games Workshop's Forge World series - it is repurposed from their Phoenix Bomber.


This is one of two finished Wave Serpents in my army, and I have a third waiting for me to get around to it. I'll gush about its utility in-game another day, and I'll add it to my ongoing projects list when I bother to get it out of the box.

I'm working on lots of projects, but that's okay

I've always had more enthusiasm than drive for my hobby projects. It seems like every time I get excited about a new project, it cannibalizes some of my interest in the last one. I think this process works out pretty well for me, because whatever I feel like working on, I've got at least one project ready to go. But I admit it can sometimes feel like nothing ever gets finished.

I've decided to try to keep closer track of how many and what sort of projects I have lined up. Maybe that will help me focus on getting things completed, or maybe it will simply make me feel better about what I've gotten done already. Either way I win.

In no particular order, as of last count, I'm working on:

40K:
Eldar Phoenix Bomber
Eldar Autarchs, magnetized
Eldar Dire Avengers
Eldar Howling Banshees
Eldar Fire Prism/Night Spinner, magnetized
Eldar Nightwing, scratchbuild
Eldar Wraithguard, sculpting

WFB:
High Elf Lord on Griffon
Basically an entire High Elf army

Role-playing:
Online/Tabletop Convergence project
D&D Campaign: The Defense of Cyre